Today I'll talk about how you can host your static website with a custom domain using some of Amazon's AWS services like S3 and Route 53.
Let's buy a domain
This is the easy part, most of the domain providers have constant sales and you can get a cheap domain for under $10 for the first year. I decided to buy a '.com' domain from godaddy.com. After we buy the domain we will have Route 53 service from AWS manage the DNS.
Create an AWS account
This is a fairly straightforward step, you can access the AWS dashboard and sign up for a Free Tier account.
Manage the DNS with AWS Route 53
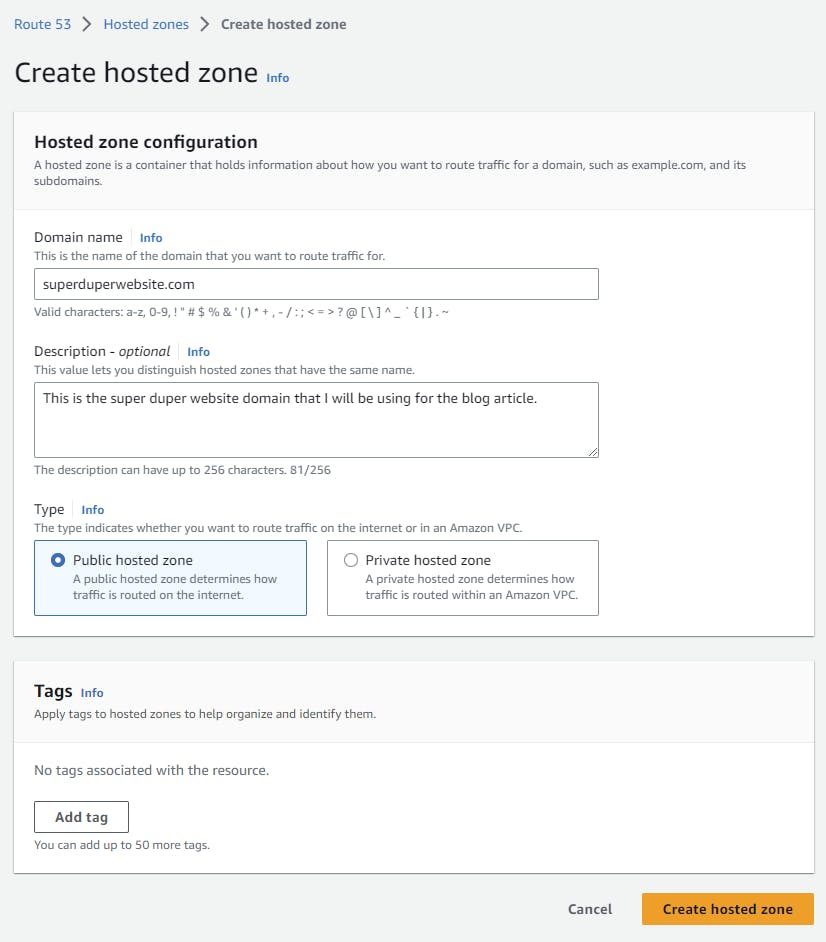
In the AWS search input, we can search for Route 53 and we'll select Route 53 Scalable DNS and Domain Name Registration. In Route 53 we need to create a hosted zone and to do that we will select Hosted zones from the left side menu and then click the 'Create hosted zone' button. Here, we'll add the domain name of the recently bought domain, an optional description (if you think you'll have so many websites that you'll forget what everything is) and as a type, we'll create a 'Public hosted zone' so we'll end up with the following settings:

After you create the hosted zone you can access it and you'll notice that you have two records with different types, one is 'NS' which stands for Name Servers and one is 'SOA' which stands for Start of Authority. We will be needing the nameservers as we need to update the ones that GoDaddy provided when we bought the domain. Although I will continue to show how to change the nameservers on GoDaddy, keep in mind that most of the big domain providers will also have this option but you'll have to search for it in the domain settings.
Update the nameservers
In the Domain settings on GoDaddy, you'll see the DNS menu, in there you will see the existing nameservers and a button to Change Nameservers.

In the change modal, select the 'I'll use my own nameservers' and add all 4 nameservers from the Route 53 hosted zone, each one in a new input, then save the changes. Bear in mind that the changes can take up to 24 hours to propagate, but it usually works pretty fast.
Notice: the Route 53 service is not free, you'll have to pay around 0.60$ per month for each domain you are hosting through them.
Create a new S3 bucket
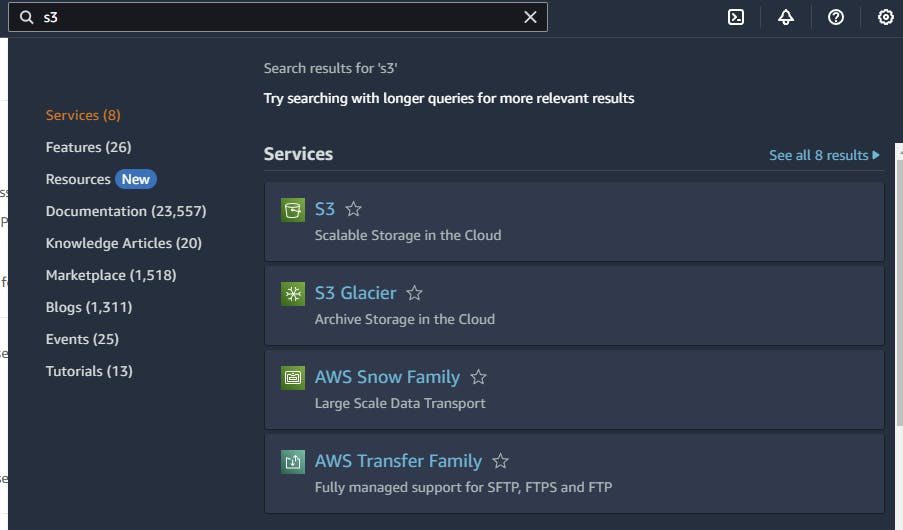
S3 is the AWS service for scalable storage in the cloud. After you create an account you can access S3 either by searching it in the Services tab or by searching S3 in the search input on the top of the screen.

When you reach the Amazon S3 main page you will reach an empty list of Buckets which are the containers where you can store different files, in our case we'll store our static files. Let's create a new bucket by clicking the orange "Create bucket" button.
One of the most important steps in creating an S3 bucket for your static website is to get the name right, for this, we'll need to set the domain that we purchased as the bucket name. The AWS region will be set based on where you expect to get the most traffic or you can leave the default us-east-1, for the "Block Public Access settings for this bucket" make sure you uncheck the "Block all public access" as this permission will allow us to make the website publicly available, all the other settings remain unchanged and in the end, you should have something like this:

After you create the bucket, you are ready to upload your static files from your project. Keep in mind that if you are using NextJS you should create a static build, for a regular build that includes server-side rendered data you will need to use a service like Vercel or Netlify or an AWS service like Amplify but about this, we'll talk some other time.
Enable static website hosting
After we create the S3 bucket and upload our static files, we need to enable static website hosting for this bucket. We can do this by clicking on the 'Properties' tab in the bucket and scrolling down until we reach the 'Static website hosting' property. We can click on edit and make sure we enable 'Static website hosting', on 'Hosting type' we'll select 'Host a static website' and on the index document we'll add the name of the entry point file from our project which most of the time is named 'index.html'.

Great! you did well so far. We have bought a domain, started managing it with AWS Route 53 and hosted our project files on an S3 bucket. Now we need to direct the domain to the S3 bucket so people can access the website using your domain.
Redirect your domain to the S3 bucket
To do this, we'll need to add a new record in the Route 53 hosted zone we created earlier. Get on the hosted zone and click on the 'Create record' button, we'll create an alias by toggling the Alias to ON, selecting the 'Route traffic to' to 'Alias to S3 website endpoint' then on the second dropdown we need to select the region where you created the S3 bucket, in our example is 'us-east-1'. If you did everything right until now you should see your bucket name in the third dropdown.

After you change this, in a few minutes Route 53 should start redirecting traffic to your S3 bucket.
Pricing recap
Because this tutorial doesn't use only 100% free services or products, I wanted to make a recap on what you should be expecting money-wise on hosting a static website and using a custom domain for it:
Custom domain: ~10$ for the first year (please check the pricing for the domain starting with year 2 as some providers will give you a really good deal for the first year but then have extremely high prices starting with year 2)
S3 bucket: Free under the AWS Free-Tier
Route 53: 0.60$ per month per domain
That's it! Now go build some awesome things!

